
 Cart is empty
Learning how to apply eyeliner can feel difficult when you’re trying to create a smooth line, match both eyes, or get the perfect wing.
The good news is that you don’t need to be a makeup expert to get started. With the right eyeliner, a little patience, and some practice, you can create simple eyeliner looks that suit your everyday makeup.
In this beginner-friendly guide, we’ll explain how to apply eyeliner step by step, which eyeliner is easiest for beginners, common mistakes to avoid, and simple techniques you can practice at home.
If you’re looking for inspiration after learning the basics, you can also explore our guide to 15 Best Eyeliner Looks for 2026: Easy Styles for Every Eye Shape.
What Do You Need to Apply Eyeliner?
You don’t need a large collection of makeup products to start.
For a basic eyeliner look, you need:
- Eyeliner
- Mirror
- Mascara
- Makeup remover or cotton buds for corrections
You can also keep a small angled brush nearby if you want to soften or clean up the eyeliner.
If you’re a complete beginner, avoid trying to create a complicated wing on your first attempt. Start with a simple line close to your lashes.
Which Eyeliner Is Best for Beginners?
Different types of eyeliner have different levels of difficulty.
Pencil Eyeliner
If you’re learning how to apply eyeliner, pencil eyeliner is usually a good place to start because it gives you more control.
It’s easier to control than liquid liner and can be smudged if your line isn’t perfectly straight.
Choose pencil eyeliner when you want:
- A soft everyday look
- Easy application
- A smoky effect
- More control while practicing
Gel Eyeliner
Gel eyeliner can create a defined look and is usually applied with a small brush.
It can take some practice, but it gives you more control over the shape and thickness of your line.
Liquid Eyeliner
Liquid eyeliner can create sharp, precise lines and dramatic wings.
However, it can be less forgiving if your hand moves while applying it.
If you’re learning how to apply eyeliner, you may find it easier to practice with pencil first and move to liquid eyeliner later.
How to Apply Eyeliner Step by Step
Step 1: Prepare Your Eyelids
Start with clean, dry eyelids.
If you’re using eyeshadow before applying eyeliner, choosing the right shades can make a big difference. Our guide to eye makeup shadows for beginners explains how to choose and use eyeshadow for different looks.
Avoid applying a heavy layer of moisturizer directly over the eyelid immediately before eyeliner, as excess moisture can make some products move more easily.
When using eyeliner around the eyes, make sure your makeup products are clean and suitable for use around the eye area. The FDA’s guidance on eye cosmetics provides additional information about using eye-area cosmetics safely.
Step 2: Find a Comfortable Position
Sit somewhere with good lighting and use a mirror that allows you to see your eyes clearly.
Rest your elbow on a table if possible.
This gives your hand more stability and can make applying eyeliner much easier.
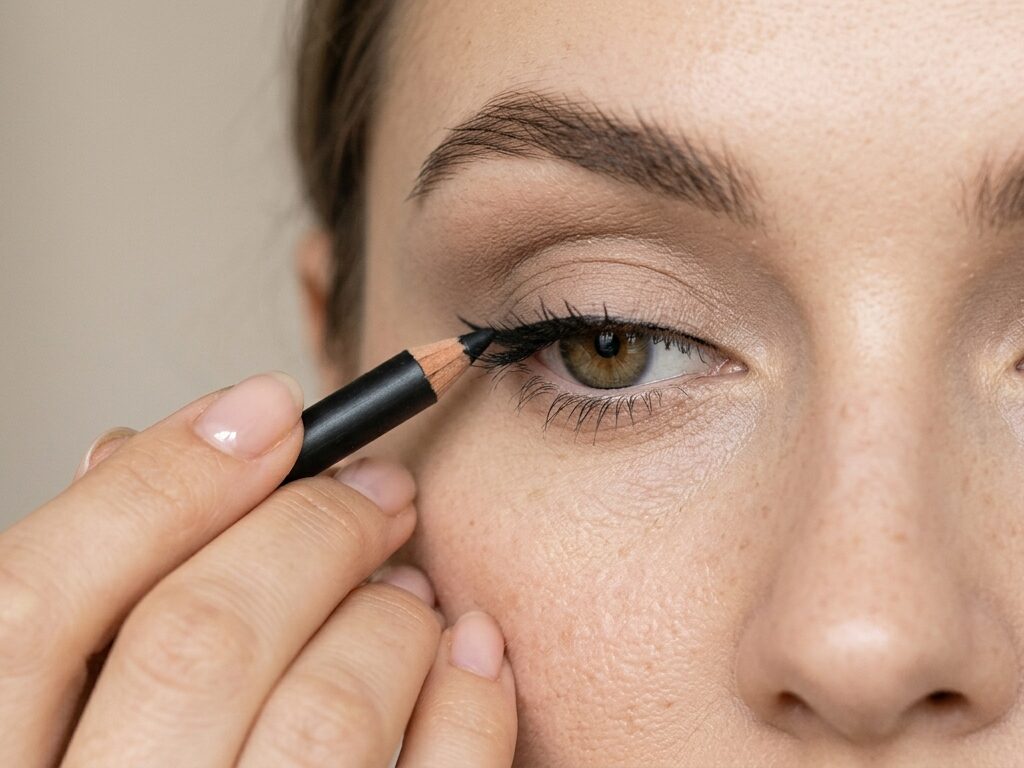
Step 3: Start With Small Strokes
Instead of trying to draw one long line across your entire eyelid, use short strokes.
Begin near the middle of your upper lash line and work toward the outer corner.
Keep the eyeliner as close to the lashes as possible.
Small strokes are easier to control, especially when you’re still learning.
Step 4: Connect the Line
Once you’ve created small strokes along the lash line, gently connect them.
Don’t worry if the line isn’t perfect.
You can make small corrections with a cotton bud or a tiny brush.
Step 5: Add the Inner Corner
Once you’re comfortable with the outer half of the eye, carefully work toward the inner corner.
Keep this section thinner if you want a natural look.
A thicker inner corner can make the makeup look more dramatic.
Step 6: Create a Small Wing
If you want a winged look, start small.
Imagine a line extending from the outer corner of your eye toward the end of your eyebrow.
You don’t need to make the wing very long.
Draw a small line from the outer corner and connect it back to the upper lash line.
It’s easier to make a small wing longer than it is to fix a wing that has become too large.
Step 7: Check Both Eyes
Look straight into the mirror and compare both sides.
They don’t have to be perfectly identical.
If one wing is slightly different, make small adjustments rather than repeatedly adding more eyeliner.
Too many corrections can gradually make both sides thicker and heavier.
How to Apply Eyeliner Without Making a Mess
Eyeliner doesn’t always cooperate, especially when you’re learning.
Here are some simple tricks.
Use Short Strokes
Long, continuous lines require more control.
Short strokes give you more opportunities to adjust the shape.
Keep Your Elbow Supported
A stable hand can make a noticeable difference.
Rest your elbow on a flat surface while applying eyeliner.
Don’t Pull the Eyelid Too Much
Gently stretching the eyelid can change its natural shape.
Try applying eyeliner while looking slightly downward into a mirror so you can see the lash line without pulling the skin excessively.
Keep Cotton Buds Nearby
If you make a small mistake, don’t panic.
A cotton bud can help remove a small amount of eyeliner and clean the edge.
How to Apply Eyeliner on Different Eye Shapes
The same technique may look slightly different depending on your eye shape.
Almond Eyes
Almond eyes can work with many eyeliner styles.
A classic line or wing can follow the natural shape of the eye.
Round Eyes
If you want a more elongated appearance, concentrate the eyeliner toward the outer part of the eye.
A small wing can help create this effect.
Hooded Eyes
With hooded eyes, part of the eyelid may be less visible when the eyes are open.
Keep the line relatively thin and check the eyeliner while looking straight ahead.
A small wing that remains visible when the eyes are open can work well.
Monolids
Monolids can look great with both simple and bold eyeliner.
You may need to experiment with thickness to find a line that remains visible when your eyes are open.
Downturned Eyes
For downturned eyes, focus on creating a slightly lifted effect at the outer corner.
Avoid following the outer corner too far downward when creating a wing.
These are general guidelines rather than strict rules. Makeup is about finding techniques that work for your own features.
How to Apply Eyeliner for a Natural Look
You don’t need a thick black line to define your eyes.
For a natural look:
- Choose brown or soft black eyeliner.
- Keep the line close to the lashes.
- Use a thin application.
- Avoid making the wing too long.
- Finish with mascara.
You can also gently smudge pencil eyeliner with a small brush for a softer finish.
How to Create a Simple Winged Eyeliner
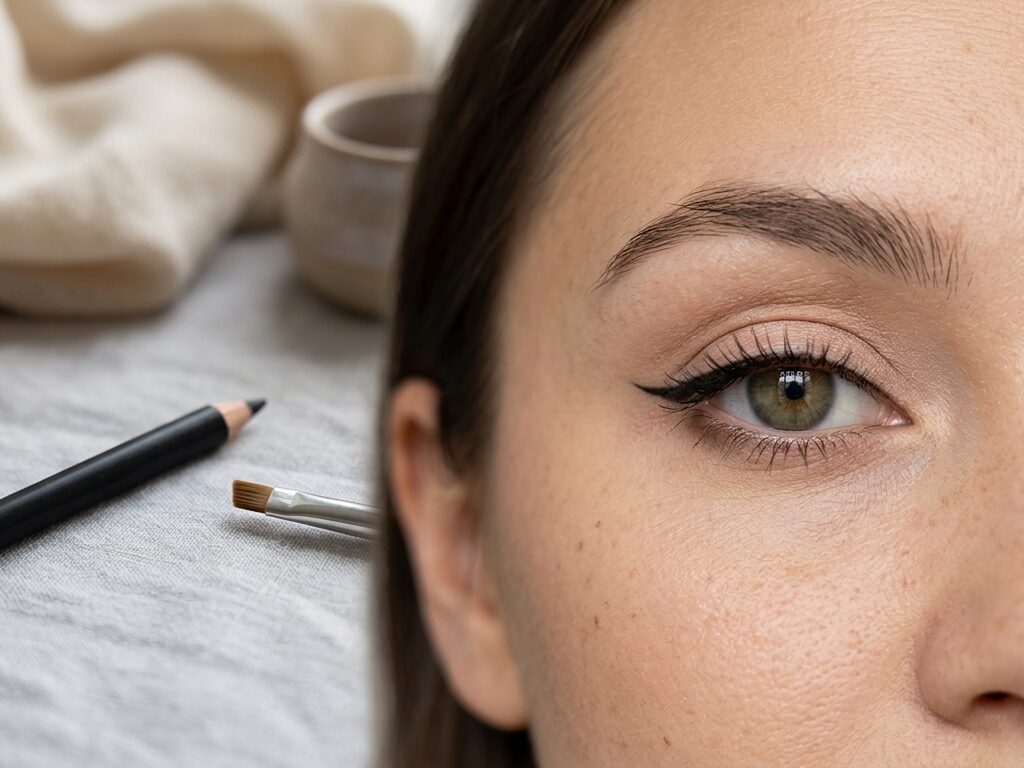
Winged eyeliner can look complicated, but breaking it into steps makes it easier.
Start by drawing a short line from the outer corner toward the direction of the end of your eyebrow.
Then connect the end of that line back to your upper lash line.
Fill in the small triangle you’ve created.
Finally, connect the wing to the rest of your eyeliner.
Start with a short wing while practicing. Once you’re comfortable, you can experiment with different lengths and angles.
How to Apply Eyeliner: Common Mistakes to Avoid
Making the Line Too Thick
It’s tempting to keep adding eyeliner when one side doesn’t look exactly like the other.
Start thin and build gradually.
Trying to Make Both Eyes Perfectly Identical
Your eyes naturally have differences.
Instead of chasing perfect symmetry, aim for a balanced appearance.
Pulling the Eyelid Too Much
Pulling the skin can change the shape of your eyeliner once you release it.
Try to keep your eye relaxed when possible.
Starting With a Huge Wing
A dramatic wing is harder to correct.
Practice with a small wing first.
Applying Too Much Product
More eyeliner doesn’t necessarily create a better look.
A clean, controlled line can be more flattering than a very thick one.
How to Apply Eyeliner: Tips for Beginners
If you’re still practicing, keep these tips in mind:
- Start with pencil eyeliner.
- Use good lighting.
- Rest your elbow on a stable surface.
- Work with short strokes.
- Start with a thin line.
- Practice before an important event.
- Keep cotton buds nearby for corrections.
- Don’t worry about getting it perfect immediately.
Most importantly, give yourself time to practice.
How to Make Eyeliner Last Longer
If your eyeliner tends to disappear during the day, there are a few things you can try.
Start with clean, dry eyelids.
If you’re using pencil eyeliner, you can gently set it with a small amount of matching eyeshadow.
Waterproof eyeliner can also be useful for situations where your makeup needs to last longer, although removal should still be gentle.
Avoid rubbing your eyes throughout the day, as this can cause eyeliner and other eye makeup to smudge.
What Should You Do After Applying Eyeliner?
Once your eyeliner is finished, apply mascara to complete the eye makeup.
You can also add eyeshadow before or after your eyeliner depending on the look you’re creating.
For a simple everyday appearance, try:
Neutral eyeshadow + thin eyeliner + mascara
For something more dramatic:
Smoky eyeshadow + winged eyeliner + mascara
If you want more ideas, our guide to 15 Best Eyeliner Looks for 2026 covers different styles you can experiment with once you’ve mastered the basics.
Final Thoughts
Learning how to apply eyeliner takes practice, but you don’t need complicated techniques to get started.
Begin with a pencil eyeliner and a simple line close to your lashes. Once you feel comfortable, experiment with small wings, smoky eyeliner, different colors, and other styles.
Don’t worry if your first few attempts aren’t perfect. Your technique will improve as you practice.
Start simple, make small adjustments, and find the eyeliner style that feels right for you.
Leave A Comment